Showing posts with label Home Improvement. Show all posts

June 25, 2013

DIY Laptop Sleeve

Hey there! Many of you may have seen me post on facebook, twitter, instagram whatever, that I made a laptop cover for my new Macbook Air! And as promised, here is the tutorial + some basic tips and tricks.

In case you didn't catch the link up there ^^^ just click here for the full tutorial from Design Sponge
But in this post I'll include my own tips and things you should probably know before starting this tutorial for yourself.


I got my fabric at JoAnn's fabric store, in the other tutorials I've seen online they've just used a thicker material that would provide a lot of protection - such as wool - and they always have a liner for the inside. Personally I wanted to make my cover look a little more Vera Bradley, so I opted for quilting material. Which is thick, as requested by the tutorials, and quilting fabrics are two sided so you don't have to buy several different fabrics if you don't want too. 
In my case I just bought one yard of the quilting fabric you see above, although I might have been able to do it for 3/4 of a yard. But this way I have enough extra fabric to do something interesting with! (If I ever get off my lazy butt that is...) 


I followed the pattern to the letter. At first I was worried because the quilting fabric looked so much thicker than the wool they used in their pictures, but eventually I was like, "Screw it. I'm doing this." And I promise you it worked out fine. 
I cut out 4 pieces of fabric to the exact dimensions they tell you to (Tip #1 - make sure you cut the fabric EXACTLY. I did it a little wonky and it caused me grief in the next steps)
The first challenge is the zipper, my zipper was about 14-15 inches long I believe, which was just a little shy of my measurements for my fabric, so I opted to put the zipper at the shorter end of the case instead of the long way (opposite of what they did in the tutorial, but it really doesn't make a difference).
Tip #2 - when aligning the zipper, it's okay if it doesn't completely come to the edge/corners of your material. I was a little worried about that but It turned out to be not a big deal.


This is what the seams look like on the zipper when I was all done with that part. Honestly I should be receiving awards right now for this zipper - it's kind of amazing.


At this point, I was so relieved that I got that zipper in and it was working, that I kinda sorta maybe just a little bit raced through the ending and ended up with a weird mess of fabric that I somehow contorted into a proper case. 
Tip #3 - When sewing up the lining and exterior fabrics, make sure to read the directions VERY CAREFULLY. I just sorta skimmed and then did stuff. It was whatever, but I kind of wish I had been more careful about sewing up onto the edge of the zipper, because there's a little hole in mine where the zipper ends sometimes stick out.


This is the side seam when I was done sewing both the lining and the exterior, and finally flipped it right side out.


My laptop fits in it perfectly! 
Tip #4 - Keep on using your laptop to make sure that the seams aren't too tight, or too close together so that the rectangle shape you make is too small for your laptop! The tutorial doesn't give you an exact inch mark to start the seam at, so it's really up to you!


 It's a good thing you can't see it, but I will tell you, that the right side of the lining is completely not sewed. I just stuffed it in there without sewing it, and I am totally not ashamed to say that.


The inside fabric/lining/other side of the quilted fabric.

Note: I am literally a beginner sewer. Like you may think I'm just saying that, but seriously. I started this with absolutely no knowledge. Sure I've made the occasional pajama bottoms, pillowcase, etc, but it's been such a long time that I didn't even know what a bobbin was when I started this project. My mother and my sister had to teach me most of the set up at the beginning because I am completely hopeless. So if I can do this, you can do this. Cross my heart and hope to die. 


The completed project!
Please excuse my crazy eyes, it was a little late and I was a little excited about finishing the case.

Dueces

June 22, 2013

Let's Get Inspired

I feel like I haven't written in forever, not that there has been much to write about, but still. It's been a few days.

I have to admit something. I have a Pinterest addiction - I feel like I should probably join some kind of meeting group or something, "Hi my name is Madison, and I'm a Pinterest addict."
I'm sure one of those exist somewhere!
But I was on Pinterest the other day, mainly looking at quotes because I was feelin' in the mood for some inspiration. I've printed some of them out and stuck them on the wall next to my bed so I can see them everyday. 


Here are some of the ones I printed and some of the ones I didn't print but wanted to;


I hope you get inspired and maybe use some of these quotes to make your own inspiration wall!

Dueces
June 1, 2012

Hello to lazy summer days

Or maybe it should be GOOD-BYE to lazy summer days.
I've made a list of things I plan to do this summer - goals, projects, books, DIYs, etc.
Because I find that being lazy over the summer isn't as fun as actually doing something! Don't you agree?

link 


I think this DIY would be difficult, so maybe it should be saved for later in the summer. But it's absolutely beautiful and I WANT ONE. Because people would be like, "Hey. Is they a fork on your arm?" 
Yes. Yes it is.


This light box would be SO useful - because waiting around for the perfect time of day to take pictures is so annoying, and usually doesn't work out too well anyways.


My room is a mess. A complete and utter disaster. Usually, it's not so bad - at least the floor is usually picked up and vacuumed, but because I haven't fully moved in yet there is NO organization for my things. It's really frustrating and I'm getting upset just thinking about it, but basically I'm living out of boxes. UGH.


I've decided to be more experimental and wear red lipstick. Just for fun.


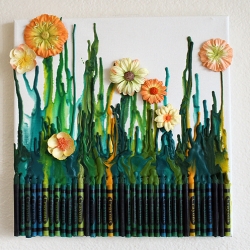
This art project is SUPER popular, but I want to make it interesting and unique. I liked this one because they had a specific design and idea in mind, it's inspiring! I can't wait to try mine! (you'll see it when I do it, never fear)


The new goal of my summer is to have more flowers. We have a beautiful lilac bush around the house, it's time to bring the beauty indoors.


I LOVE embellished collars, they add a pop to an outfit without the hassle of long dangly jewelry. So it's time to go thrifting! For beautiful shirts to embellish!


This DIY is so simple and moustachy that I can't wait to get started! Plus, it's a moustache. Who doesn't want a moustache ring?


I've always been fascinated by the art of embroidery. I seriously think it's amazing and creative, so i've made it my summer goal to emroider something, maybe a shirt of a pillow - or maybe shoes! You never know...


Uhm yes. I have two very boring grey sweaters that would love to be touched up with these cutesy elbow patches. There are some "holes" in this tutorial, no pun inteanded, so I'll probably just make up my own way. 


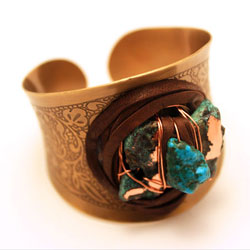
This is a bracelet made of broken jewelry. Because who doesn't have broken jewelry lying around? Seriously, it's bordering on hoarderism. (Hoarderism? Is that a word?)


My mom yells at me every 5 minutes because I never have a coaster with me, and it messes up her wooden furniture. Which is completely understandable, so I think i'll remedy this little problem of mine and make some cute coasters :)


I have SO many broaches from my mother, and I can't think of a cuter way to use them than this DIY broach necklace!


The mullet skirt. The new must-have of any fashionable closet anywhere. So why not make my own? 


I think we can all agree that most of us sleep in sweatpants and t-shirts. No one ever looks cute going to bed, it's just a fact. Recently I felt like looking cute going to bed didn't have to be hard, so when I found this tutorial I made up my mind. I was gonna look cute going to bed. So sue me.
(can also me remodeled into cute swimsuit coverups with the right fabric!)


I love this shirt to death. It's seriously simple and totally summer chic. BRING IT BABY.


Re-fashion a T-shirt into a cute ruffle top and pair it with a maxi skirt. The perfect summer outfit. 


First off, let me just tell you that these are scarves. Uh yeah. SCARVES. Turn these SCARVES into SHIRTS. oh how I love you scarves-that-can-be-turned-into-shirts.


On a more serious note, I actually have plans to do some hard-core workout this summer. Ok maybe not THAT hard-core, but enough to put up a sweat, so this DIY is perfect! Now I don't have to spend tons of money on workout clothes! Hurray! 


I love this longer skirt, don't you?


On a scale of one to creepy this picture is like, Halloween. But I love the idea of these glowing jars, which would be perfect for a summer party or table center piece. 


I really love this cut-out because of all of the different shapes you can make, or layers, or fabrics etc. It's just a very versatile DIY.

There's probably more that I'll find for things I want to do, and I'll add them to the list - but this is enough for now. Don't you think? 

xoxo

ps - what are your summer goals and planned projects?